It’s #OneRoomChallenge time! If you’re visiting for the first time then welcome! Here’s the link to catch up on Week One.
Bookcase wall. Done.
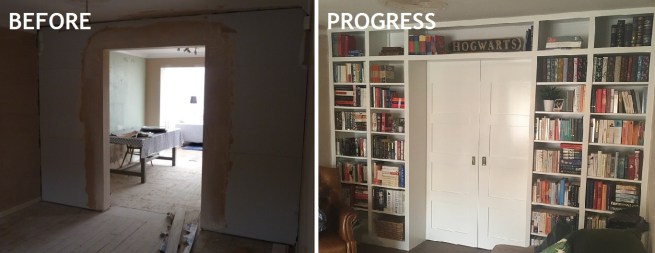
Although definitely not properly organised or remotely styled in any way yet! Apologies in advance for the terrifyingly poor quality of the pictures in the post but pretty much all of this work has been done at night, plus at super speed so I only really had chance to grab some quick snaps on my phone… #bloggerproblems.
I’d gathered a lot of bookcase wall inspiration before starting out on this project and I knew that I wanted a full wall of bookcases that went from floor to ceiling. I considered having something bespoke made from scratch by a carpenter but quickly scrapped that idea, as even without getting any quotes I knew it would be wildly out of budget.
I then considered using IKEA’s Billy bookcases, as so many have before, and I was pretty confident that they would look good but, having owned a fair few Billy’s in my time, I was a little concerned about how well they would hold up. I’m a book hoarder and these bookcases will be used to store a LOT of books, not just the odd few and some pretty trinkets. Experience had taught me that the 80cm wide Billy’s tend to suffer from bowing shelves with time from the weight of a full shelf of books.
Then, I’m going to melodramatically declare that, destiny took hold. When we had the wall knocked through between the living and dining rooms, I originally requested that 80cm of wall be left on either side of the doorway opening, to fit a Billy bookcase. However, when the work came to be done it was pointed out that I had failed to account for the fact that on the dining room side was a small radiator and the pipes for it would stick out into the opening if I went with the size I had been planning. So, there had to be 100cm of wall on either side of the opening which meant I was back to the drawing for what I could use now that the Billy bookcases were 100% out.
I’ve spent a ridiculous amount of time obsessing over what I could use to get the look I wanted without spending a tonne of money I just didn’t have, losing count of how many Pinterest searches I’ve done, websites I’ve visited and rough sketches I’ve drawn up of just how I wanted the final bookcases to look. The 100cm size was proving an impossible obsticle for me – even when I accepted defeat on sticking to a sensible budget for this project I was still struggling to find any 100cm wide bookcases that would be suitable. Then one evening it hit me, IKEA’s PAX wardrobes come in 50cm, 75cm and 100cm widths. Couldn’t I use those to make the bookcases from? Spoiler alert: Yes. Yes I could.
Here’s how we achieved it…
WHAT YOU NEED:
IKEA PAX Wardrobes (I used x5 white 50x35x201cm PAX wardrobe frames)
IKEA KOMPLEMENT shelves (I used 24 white 50x35cm KOMPLEMENT shelves)
IKEA VARIERA hole cover caps
Trim (I used pine strip wood for the fronts and small right angled plastic trim for the trim used at the back of the upper shelves)
Laminated harwood for back of upper shelves (I used two pre-made bath side panels from B&Q)
Small right angle brackets
Paint (I used Valspar paint in a satin finish, colour matched to the frames)
Glue (I used a combination of No More Nails and Evo-Stik Gripfill)
Paintable caulk
Screws, rawl plugs, panel pins
Wood batons to create framing to attach bookcases to (if you’re attaching straight into a wall you wouldn’t need this but, because of the sliding doors I’ve added that go behind the bookcases, I had to build a frame to attach the bookcases to.)
WHAT YOU NEED TO DO:
(I’ve just included a brief overview here and I haven’t gone into a step by step detailed breakdown of how I built this as it would make this post incredibly long but let me know if you’d like one and I’ll create a separate post with a full, detailed explanation of exactly what we did to build the bookcase wall.)
The shortened summary is that we built a frame out of wood batons the same thickness as the sliding doors we installed last year, also adding batons of wood above the sliding door rail and at the ceiling.
Then we assembled the first four PAX frames and attached the ones to the far left and far right into the walls, running screws through the frame into the walls and also at the back into the wood batons. The remaining two frames were attached to those already in place using several screws to bolt the two frames on each side together. It sounds potentially flimsy but it’s rock solid. I’m no skinny minnie and I tugged and shoved these around to test their strength and they’re not going anywhere. 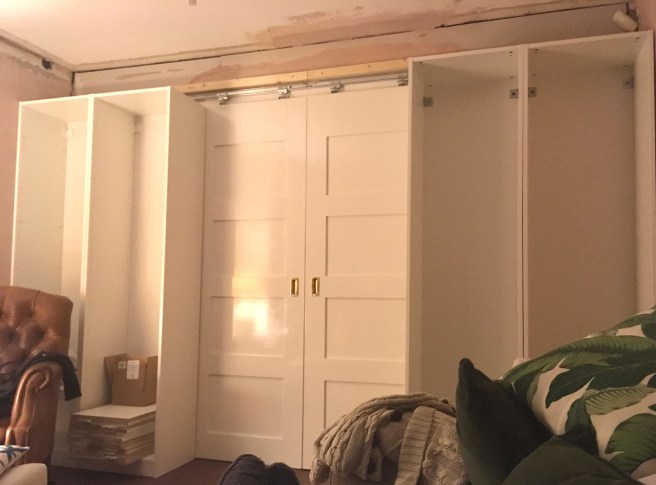
The fifth frame was used to create the upper shelves and the section which spans over the doorway. One of the side panels was laid across the opening and attached using both screws and No More Nails glue. A small baton was attached to the rear of this shelf which was then drilled into the baton running above the sliding door rail. This is mainly to help prevent any bowing of this long shelf in the future rather than for adding any real structural strength but I’m sure it all helps! The remaining side panel was then cut up to cover the remainder of the top of the four bookcases already installed so that the bottom of these upper shelves was level all the way across.
Laminated hardboard was cut down to size for the backs of the upper shelves and was also attached to the ceiling to create a “top” for the bookcase. The uprights on these top shelves running up to the ceiling were also created by harvesting the remains of the fifth PAX frame. They were attached in place using small right angle brackets. Trim was then added to the backs of these upper shelves to hide the cuts and caulked at all the joins.
A small baton of wood was then added to the ceiling, lining up with the fronts of the bookcases for trim to be added to later on. 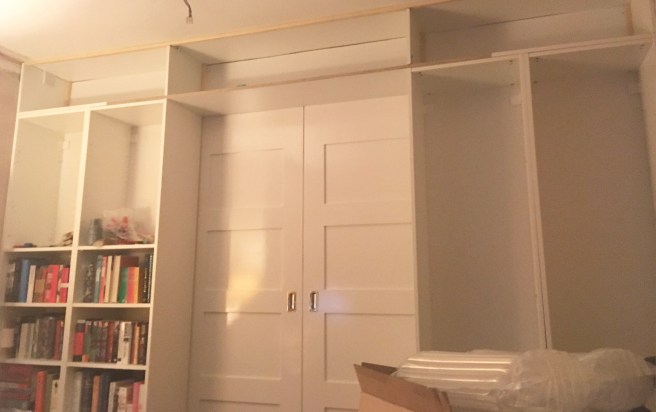
Shelves were put in place in the lower PAX frames next before using the VARIERA hole covers on each pre-drilled hole in the frames that was unused. This was probably the most tedious part of the process!
Trim was then added to the fronts of the bookcases. Originally I had thought I would trim out each shelf but I decided I actually quite liked the look with only the uprights and join between the four upright PAX and the very upper shelf being trimmed. A piece of trim was also added to the very bottom of the frames as the bottom PAX frames sit back a little and I wanted everything to be flush. All the trim to the fronts was attached using No More Nails and small panel pins carefully hammered in so as not to split the frame. 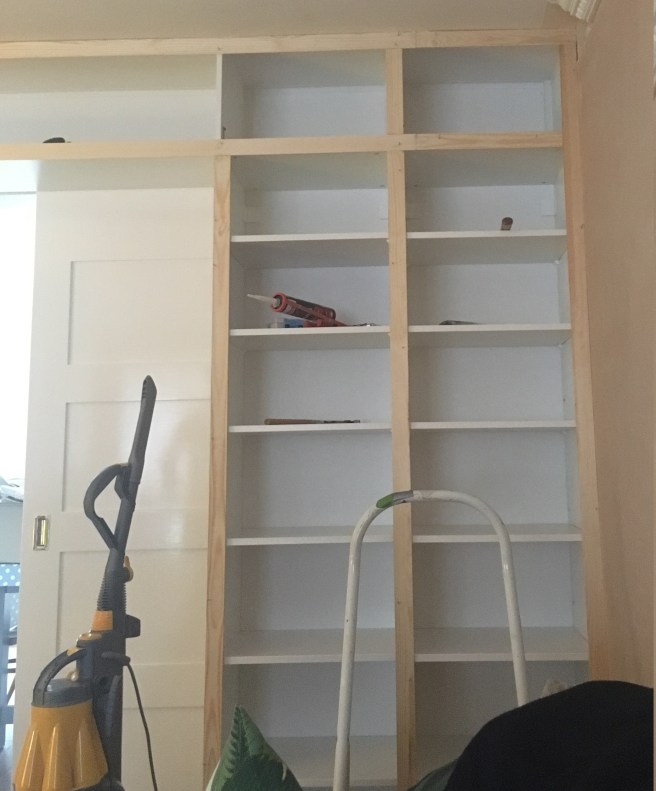
The penultimate step was to wood filler all the joints of trim and then lots and lots of sanding to make it all smooth and seamless.
Finally, all the trim was painted with Valspar paint in a satin finish, colour matched to the IKEA white frames and shelves. 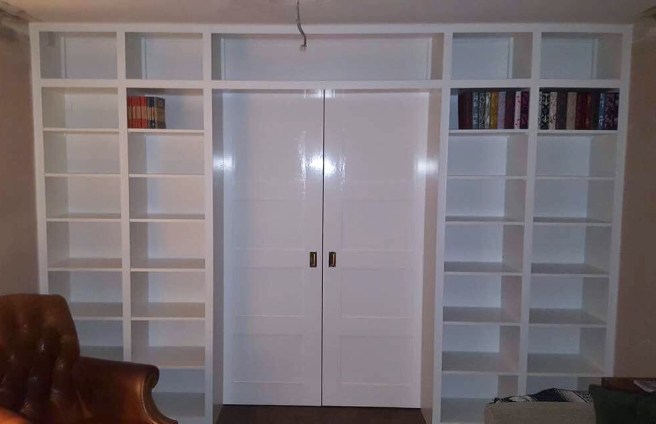
I couldn’t resist starting to add some of my books as soon as the paint was dry but I’m sure I’ll end up changing it a million times before the final reveal. 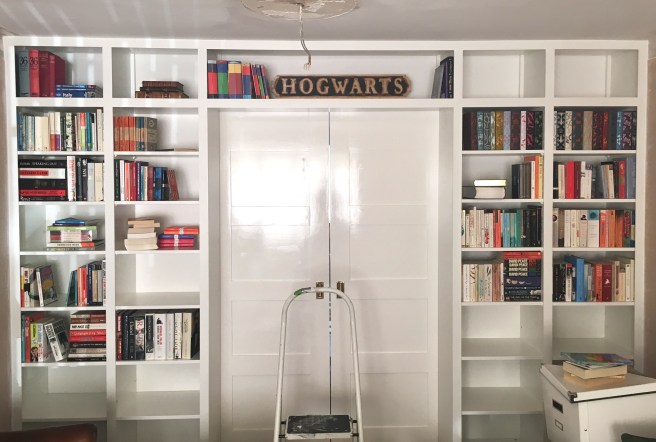
And as for the dangling wire from the ceiling – an electrician is currently working on the ceiling lights as I type!
The To Do list is currently looking like this:
{PROJECT LIST}
- Electrician to change ceiling lights from two fittings to one
- Plasterer to skim coat ceiling
Build bookcase wall- New coving / crown molding
- Beef up baseboards / skirting boards
- Paint walls
- Decide on fire surround / mantlepiece
- Build picture ledge behind sofa (as per Chris & Julia’s)
- Bring in furniture
- Replace window blinds (budget permitting!)
- Decorate (cushions, artwork, rug etc)
See you next week!
Don’t forget to check on the progress of the other guest participants over on Calling it Home.

Your built-ins look AMAZING!
Thank you! 😊
this looks so good!
Brilliant!
Thanks Brenda!